Here's round 1. But it still seemed a little "blah" to me.
I love the look of shelves, built-ins, cabinets, etc. that are painted, but since since I wanted to stick with neutrals, a painted "pop" of color didn't seem like the solution. Instead, I compromised and decided to use fabric to "upholster." The fabric was left over from a previous project-FAIL, so this seemed like the perfect way to salvage a loss. Gotta look on the bright side, right?
Instead of applying wallpaper/fabric/paint to the shelf itself, I bought 2 foam boards from the Dollar Store (they were significantly cheaper than a craft store and were the perfect size). I began by measuring the shelves and marking the dimensions on the foam boards.
I used an exacto knife and large ruler to cut the boards into the dimensions of each shelf (less a little bit to allow wiggle room for the fabric). I've found the best way to cut foam board is to lightly score the top layer, bend and snap (ahem, Elle Woods) and run the exacto knife through the crease for the second layer, if necessary.
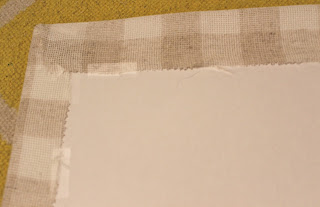
After I measured and tested each board for an accurate fit, I cut out a piece of fabric that extended past the foam board by an inch on each side. This particular fabric is a loose weave which made it a little tricky to pull tight and yet maintain keep the pattern straight. Learn from my mistakes and don't chose curtain fabrics for upholstery projects, no matter how cute!
Because I couldn't find my basic office stapler (hashtag messygirlprobs), I ended up using scotch tape to secure the fabric around the board. I wrapped the corners as if I were wrapping a present.
Since the boards were exactly the size of the shelves, there was no need to attach the foam to the shelf itself. It's snug as a bug! A putty knife can be used to wiggle the boards out should I decide I want to swap out the fabric. Is it weird I kinda want to wear a pretty gingham dress to match my "new" shelves?
I also finally got around to printing out some favorite black and white photos of friends and family to make my lonely frames happy! (Yes, I finally put pictures in the frames that had been listlessly lounging around for 3 years now. If you don't believe me, take a peek at the photo in this post from 2 houses ago here. Real talk, ya'll)
And...the final product--a lot of pizazz for a $2 upgrade!
Check back in for the second shelf post...because there's more than meets the eye with this little built in. Hint: it involves shoes!
Has anyone ever tried upholstering shelves?


No comments:
Post a Comment